Macify's conversion process presents its interface as a wizard. It will hold your hand through providing the required information to convert your app to Mac OS X and present it in a step-by-step environment.
The following is a list of the screens in the Macify wizard, along with any notes for items that may require additional consideration.
1.Step 1 - Introduction

This is the first screen you will see upon launching the Macify wizard.
This is the first screen you will see upon launching the Macify wizard.
2. Step 2 - Project Files
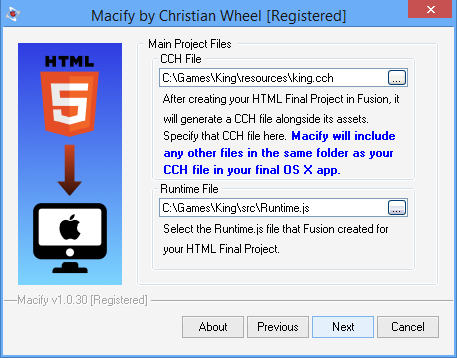
This is where you provide Macify with the files that make up your application. You will need to point it to the CCH file that Clickteam Fusion created for your HTML5 project. Any files (such as sounds, images, text files, etc) that are in the same folder as your CCH will also be bundled with your Mac OS X app. In the example pictured above, all files in the folder C:\Games\King\resources will be included.
You also need to provide Macify with the javascript runtime file that Fusion generated for your application. This is the "engine" that makes your application run in HTML5. Macify could have included this file on your behalf, but in order to apply newer versions of the file as they are released (and to avoid violating Clickteam's copyright on the file), you must provide your instance of it.
3.Step 3 - App Settings
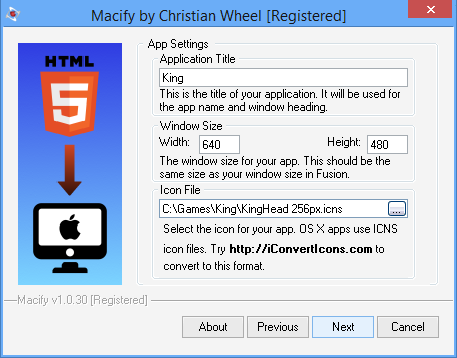
On this screen you customize the internal settings of the Macify runtime. The Application Title is used internally for the app name (this will be the name of the menu when your app is run on Mac, along with the internal name that OS X refers to your application as), and also as the caption for the Window header as in the screenshot below.
Also on this step you will provide the .icns file that will serve as the icon for your project. This is an OPTIONAL field. If you do not provide an icon, the default Macify icon will be used in your resulting OS X app.
Notice the title of the window and the App menu name.
A note about Retina
A recent feature in computing is High-DPI displays. These allow systems that support high resolutions to pack more than one dot per pixel and offer ultra-sharp sub-pixel rendering. Apple was actually well ahead of Microsoft in the modern implementation of this technology, they call it "Retina" on Mac OS X.
Here's an illustration of the what non-Retina vs. Retina might look like when viewed on the appropriate hardware. You can see that Retina mode uses more pixels but offers a superior visual experience.
Depending on the resolution your application runs at, it may or may not benefit from the extra pixels that Retina provides. But because Retina forces the graphics engine to render at least double the amount of pixels (can be even higher depending on the system's resolution), Retina mode negatively affects the performance and fps of your app or game.
If your app does not have a lot of animation and is relatively lightweight, you should be able to leave Retina mode turned on without much of a hassle. If, however, your app runs too slowly on Mac OS X, rebuild it with Retina Mode disabled by unchecking the option in the dialog below.
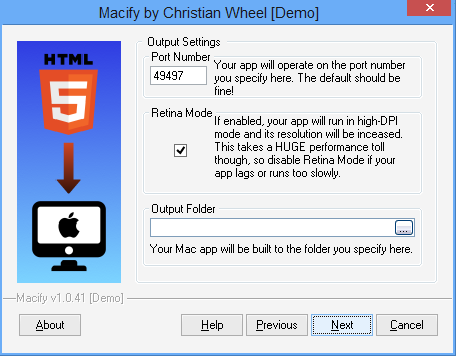
Port Number
The port number is the port that the internal webserver will operate on. Any number above 1000 should work unless that port is already being used by another app or service. It is recommended to leave this on the default of 49497 and only change it if there's a problem.
4.Step 4 - Building Your Mac OS X App
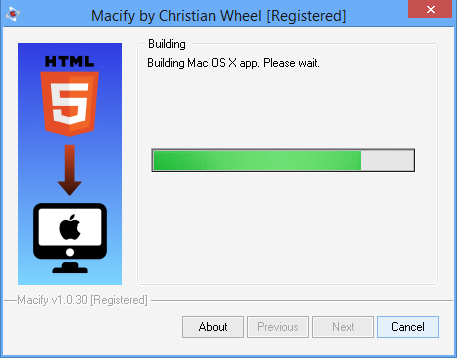
This screen shows the progress of building your app. It shouldn't take very long. Most projects are built in just a few seconds!
This screen shows the progress of building your app. It shouldn't take very long. Most projects are built in just a few seconds!
5.Step 5 - Done!

At this point, your app is built. You can click "Show file in Explorer" to locate the file to copy to your Mac.
If you want to build another app, click Finish and start Macify again.
At this point, your app is built. You can click "Show file in Explorer" to locate the file to copy to your Mac.
If you want to build another app, click Finish and start Macify again.